🧑🎨 Overview
The following sections describe how to design experiments using the 🫠 Smile project. It covers the basic of programming new task elements, configuring the timeline/flow of your experiments, and customizing the look and feel of your experiments.
👩💻 Developer mode
When learning about 🫠 Smile and later developing/debugging your experiment, it is useful to interact with Smile using a web server running on your local computer (i.e., your laptop or desktop). 🫠 Smile provides a special local developer mode that adds some interface elements to the page that help you debug and test your experiment. You can learn more about developer mode here. But the TL;DR is
npm run devin the project folder to get started.
⚙️ Configuring
Every experiment is different and requires different configurations options for things like the database credentials, etc... In 🫠 Smile, configs are set using .env files. Some of these are automatically generated, some are pass from the base repo to child repos, and some need to be customize for each experiment. This section of the documentation explains all the configuration settings avaialble.
🧩 Components

This section introduces the concept of a component and how components help organize code by making it more modular and reusable. Then we discuss specific features of Vue.js components (e.g., single-file components, declarative rendering, and reactivity) that help make web development code more compact and error-free.
A large part of designing your own experiment will be implementing a custom component for your task, or borrowing from an existing one.
🏗️ Views
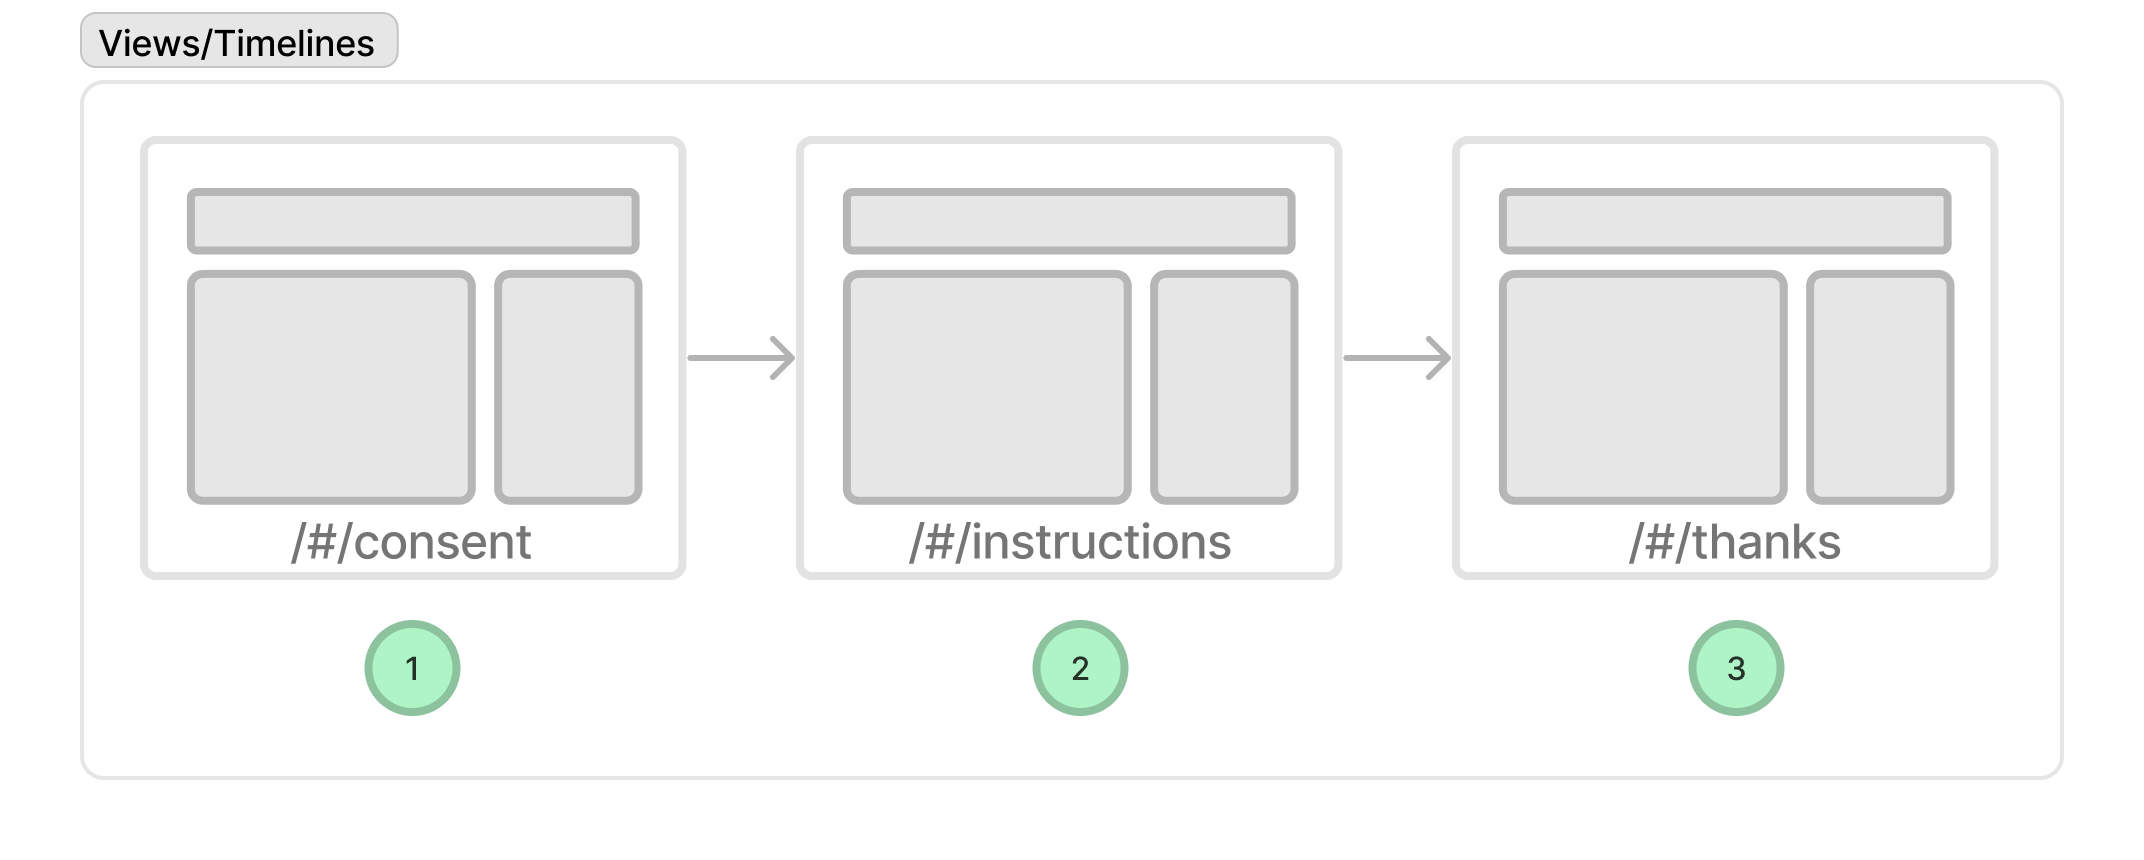
Most experiments are made of of several phases (e.g., welcome, informed consent, instructions, debriefing, etc...). We call the phases "Views" and each major phase of an experiment is associated with its own Vue component. Learn about views here.

Smile comes with several built-in views for common phases of an experiment. This includes things like obtaining informed consent, presenting instructions, CAPTCHAs, and presenting a thank you page. We describe these default built-in views and provide an overview of how to customize them for your own experiment.
🔀 Timeline and Design
Most experiments require participants to proceed through these phases in a particular order. For example, informed consent must be provided and agreed to before we perform the actual experiment. Smile provides a timeline that you use to configure this behavior.
The timeline is configured in an important file in every 🫠 Smile project called the design file (located at src/user/design.js). This file is where you configure the timeline for your experiment, including which phases are included and the order in which they appear. In addition the design is used to specify randomization across conditions, preloading of content, and other important features of your experiment.
You almost certainly will need to edit this file for your experiment.
🪜 Stepping Views
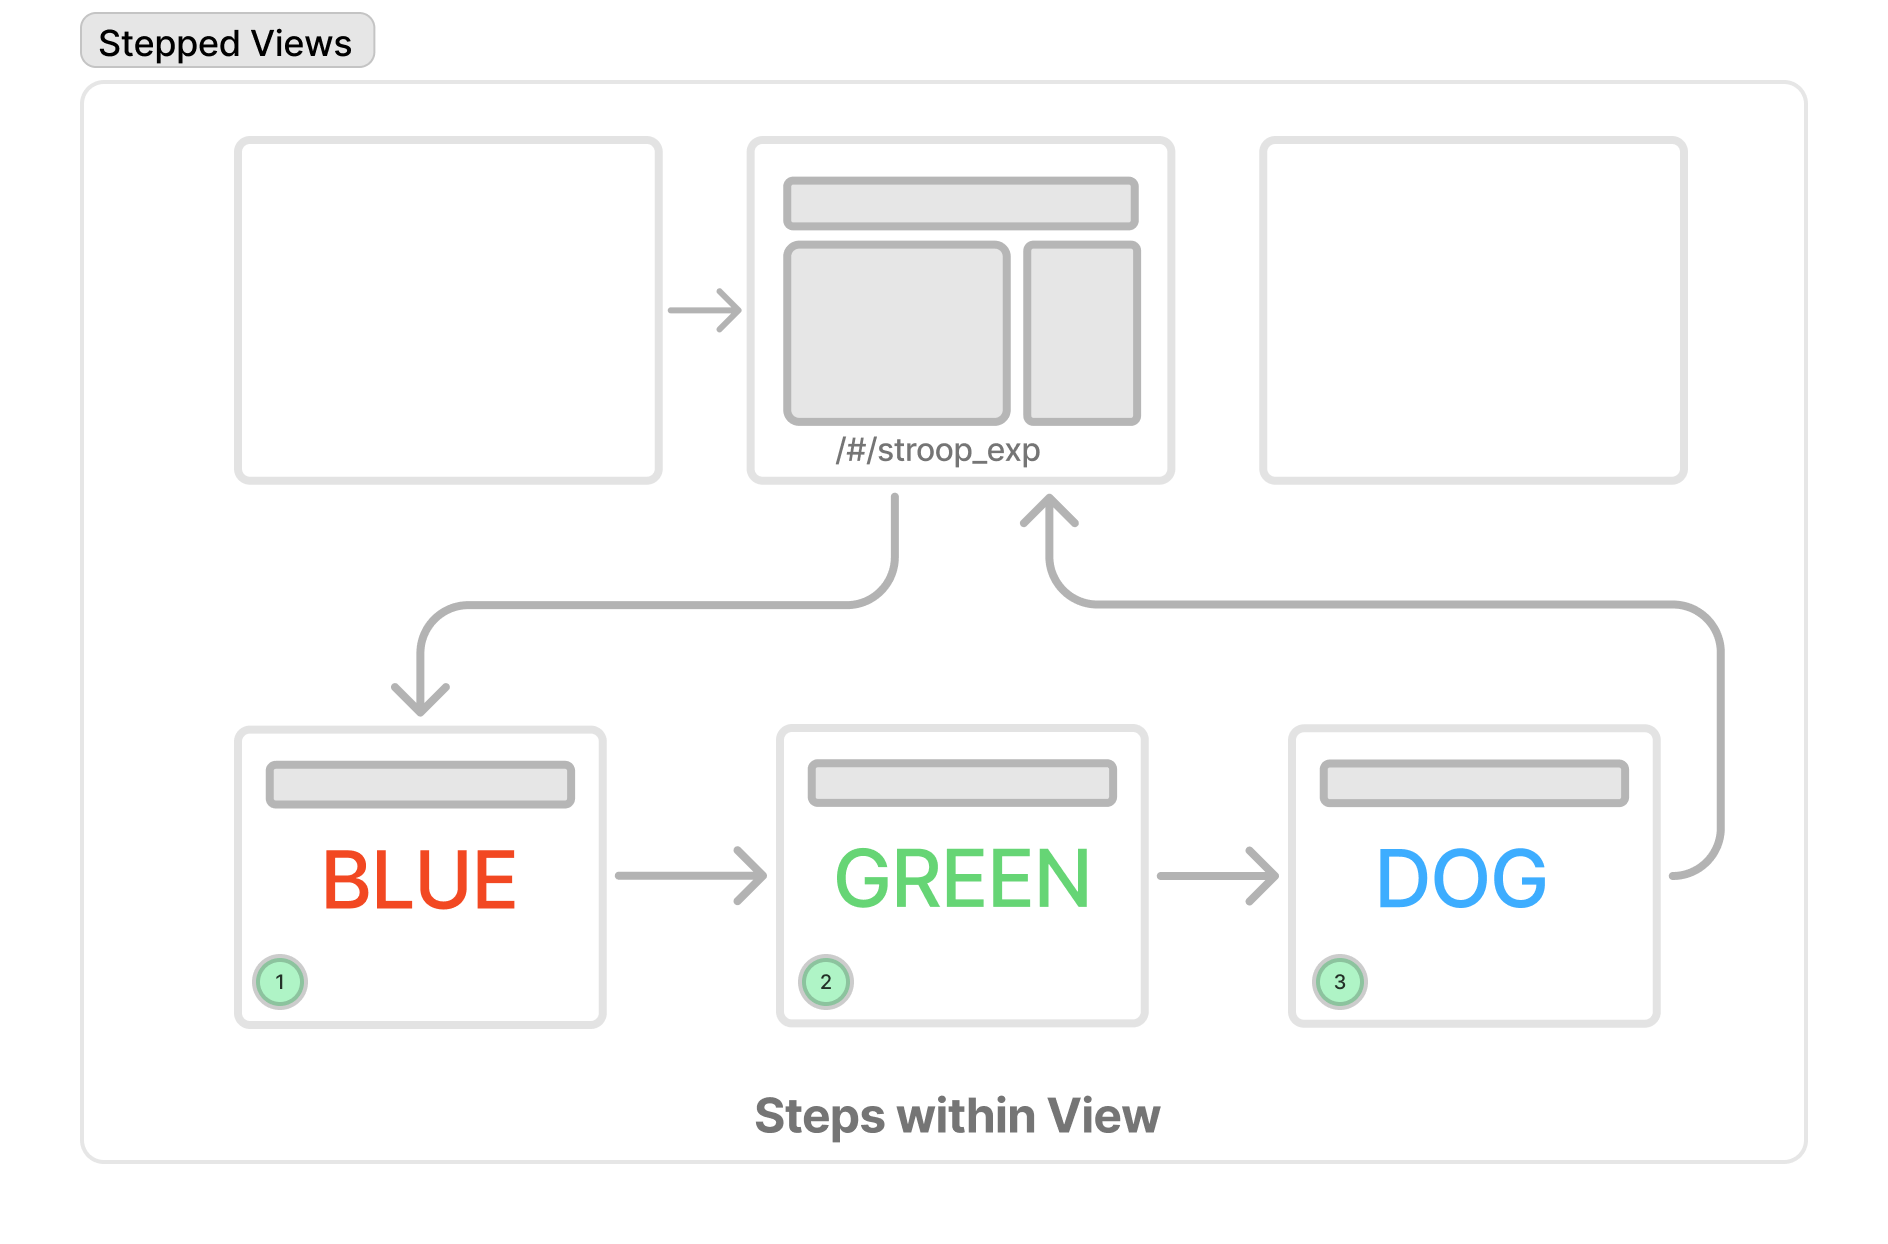
Many experiments are organized into a series of repeated events called "trials". Trials are different than Views because they often repeat the same basic structure many times (analogous to the difference between a 'slide' and a 'build step' in a Keynote/Powerpoint presentation). Smile provides several features for stepping views through a series of trials. We introduce the concept of a "step" and how to programmatically advance through a sequence of steps within a particular View. The same concept is also used to add sequential steps to any type of view (e.g., a sequence of instructions or a multi-part form). Critically, by using the built-in 🫠 Smile "stepped Views" feature, if a participant refreshes the page or loses internet connection, they can pick up where they left off.

✍️ Autofill
When developing and debugging your experiment it is useful to have a way to "fake" data from participants. This can be used to quickly advance through the experiment to test different parts of the code. Smile provides a way to autofill forms with fake data. In addition, you can generate fake, but realistic data for your experiment. This can help later to test your data analysis scripts.
🎲 Randomization
Almost all experiments require some form of randomization. This could be randomizing participants to a condition or randomizing the order of trials. Smile provides several mechanisms for randomizing the order of the flow of experiments.
🖼️ Image and Videos
Many experiments present videos or images to participants. We describe how to distribute images and videos with your Smile project, how to preload them so that they appear immediately when needed, and how to display them in your experiment.
🧑🎨 Styling, CSS, and Icons
Smile uses the Bulma CSS framework for help with styling interface elements. This provides nice looking buttons, tables, and other design elements. Here we describe how to use Bulma to change the look and feel of your experiments. We also describe how to use icons in your experiments which add polish and help users understand the interface. Of course, you can style your components with custom CSS as well or overwrite Smile defaults for your entire project.
:🎥: Saving and Recording Data
The most important function of any web experiment platform is securely saving data. Smile provides serveral ways to save and record data. In addition the Smile API provides convenience functions for data saving, making it quick and easy to save and store what you need.